honda305 Home honda305 Auctions honda305 Gallery honda305 Forum


honda305.com Forum

Login
□ Search
□ FAQ 
□ 
Vintage Honda Owners,
Restorers, Riders and
Admirers

Project CB92 - A Journey to Resurrection

JC56, JC57, C70, C71, CB71, CE71, CS71, CSA71, CS72, CSA72, C75, C76, CA76, CS76, CSA76, CS77, CSA77, CB92, CA95
User avatar
Rizingson
honda305.com Member
Posts: 57
Joined: Mon May 07, 2012 6:50 pm
Location: Parker, CO USA

Post by Rizingson » Sat Apr 02, 2016 7:56 pm

Well it's finally time for some heavy lifting. The motor has been checked out and all tune-up adjustments made. So it's time to get it put in place.

Sitting on ready!
Image

Some final prep before hoisting it up, such as pulling the clutch cable & throttle cable through the frame while it's easier to get a hand up inside. Also making sure all the grounding points are cleaned of any paint. I also installed front brake cable while I was at it.
Cables routed into frame.
Image

Motor ready to be lifted. Just need the wife to lift it up while I put in the bolts!!
Note clutch cable exiting under the left side cover area.
Image

OK, so I used a small floor jack. Along with some cautionary rags to prevent any accidental oopsies.
Finally in place!
Image

I installed the motor before the swing arm because the front foot pegs are also partly attached to the swing arm and need to be installed on each end of the swing arm bolt. Just easier to deal with the engine mounting bolts prior to swing arm installation.
Image

Tail light assembly had also been installed earlier, after grinding off excess paint from the frame and bracket to backing plate. Then threading the wire through the inner fender channel and placing behind all the clips.
And finally the rear shocks to hold up the swing arm.
Image

Next it was time to put on the unique rear mud flap. As well as the tail light bulb and lens.
Here I did a quick check of the tail light to make sure the grounds were good back to the point the battery grounds to the frame. I want to make sure that all's good before I put on the rear wheel.
Image
Brake lever with spring return and switch have also been installed.

Time to take a break for today, further updates to come!

Steverino
honda305.com Member
Posts: 409
Joined: Wed Nov 05, 2014 10:22 pm
Location: Oregon

Post by Steverino » Sun Apr 03, 2016 12:55 pm

Nice Progress Rizingson. After too many close calls I started covering my front fender with bubble wrap and rags. Those exhaust collar retainer bolts are brutal.
S

User avatar
Seadog
honda305.com Member
Posts: 1272
Joined: Thu Dec 25, 2014 9:54 am
Location: Cape Cod, MA

Post by Seadog » Sun Apr 03, 2016 2:26 pm

Amazing. Beautiful work.

User avatar
Rizingson
honda305.com Member
Posts: 57
Joined: Mon May 07, 2012 6:50 pm
Location: Parker, CO USA

Post by Rizingson » Sun Apr 03, 2016 2:46 pm

Steverino wrote:Nice Progress Rizingson. After too many close calls I started covering my front fender with bubble wrap and rags. Those exhaust collar retainer bolts are brutal.
S
Nice tip, I wasn't even focused on those studs. Maybe even some rubber caps or some piece's of hydralic hose slightly longer than the stud slipped over the bolts would give a little more protection. At over $600 dollars if you could find one, I wasn't about to damage that alloy fender!

User avatar
G-Man
honda305.com Member
Posts: 5678
Joined: Wed Mar 25, 2009 5:17 pm
Location: Derby, UK
Contact:

Post by G-Man » Sun Apr 03, 2016 3:37 pm

Beautiful restoration.

G
'60 C77 '60 C72 '62 C72 Dream '63 CL72
'61 CB72 '64 CB77 '65 CB160
'66 Matchless 350 '67 CL77
'67 S90 '77 CB400F

User avatar
Rizingson
honda305.com Member
Posts: 57
Joined: Mon May 07, 2012 6:50 pm
Location: Parker, CO USA

Post by Rizingson » Sat Apr 09, 2016 4:17 pm

Time for another belated update. Spring seems to have finally come, at least for a little while, so I also felt like it was time for Spring Break! It was tough to focus on this project as I was also getting other bikes out of hibernation and giving them a well deserved exercise run.
This is the time when little visual progress takes place as there are so many small items and loose ends to attend to, as well as those times when you realize, "I should have put that on first, so now I got to take this or that off again and redo it".

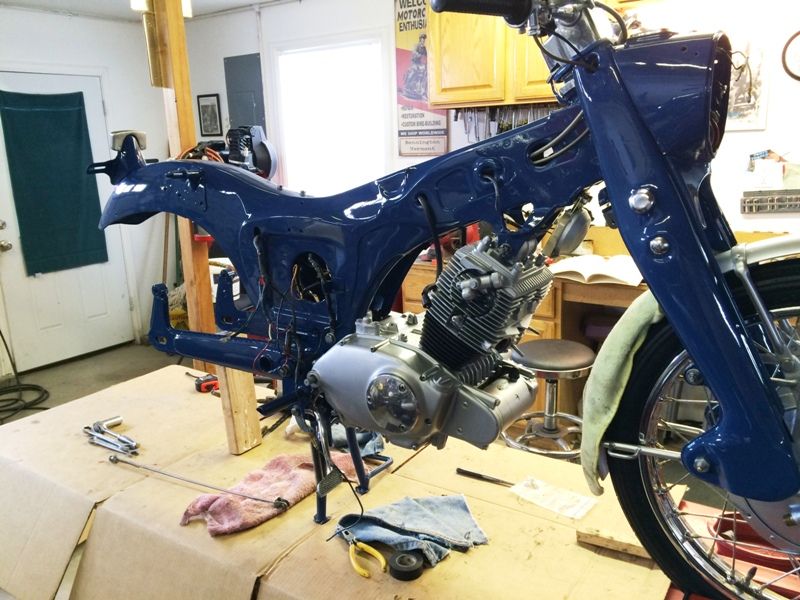
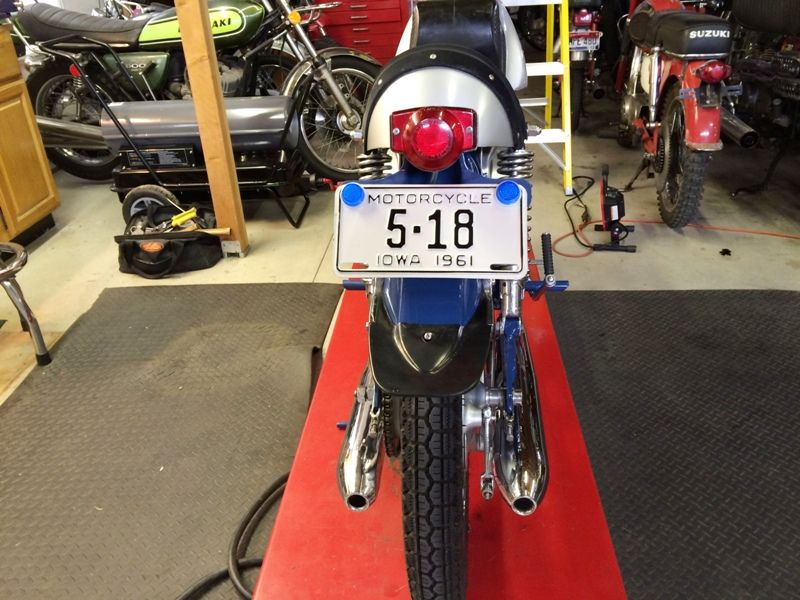
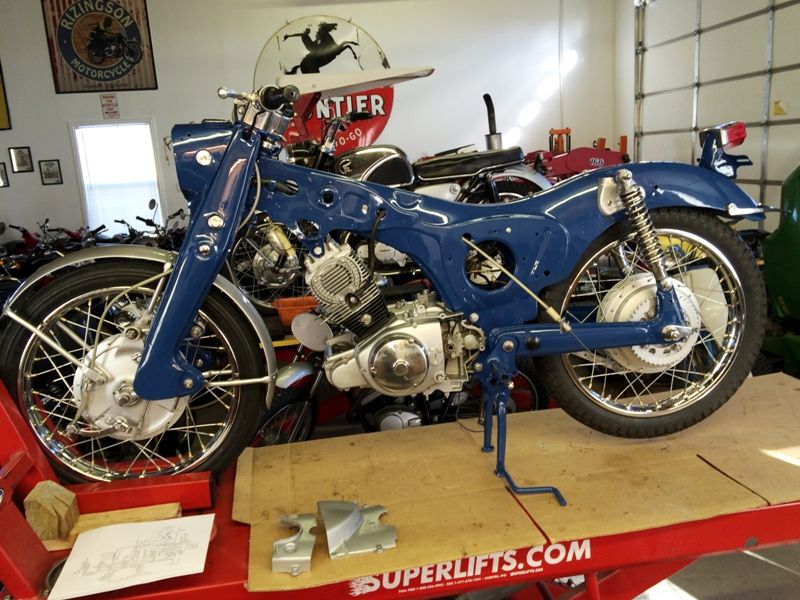
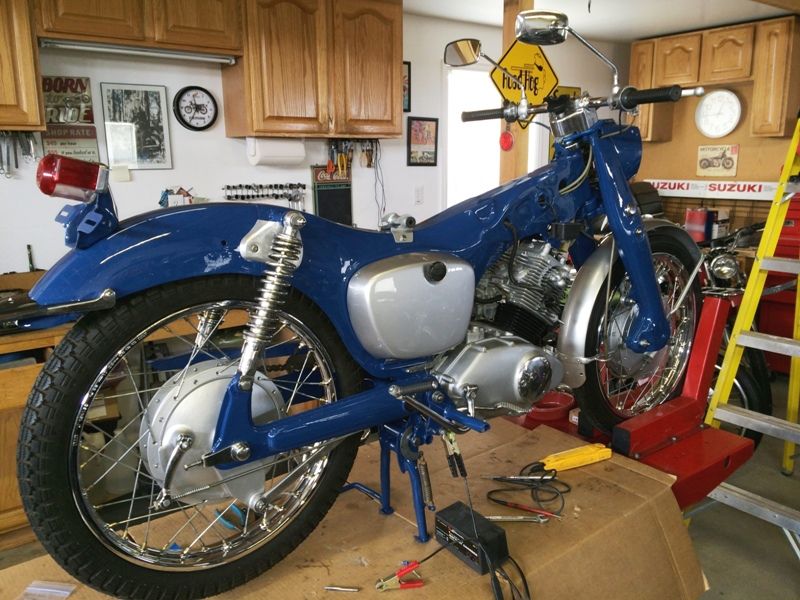
The main noticeable item this week was finally getting the rear wheel in place.
Image

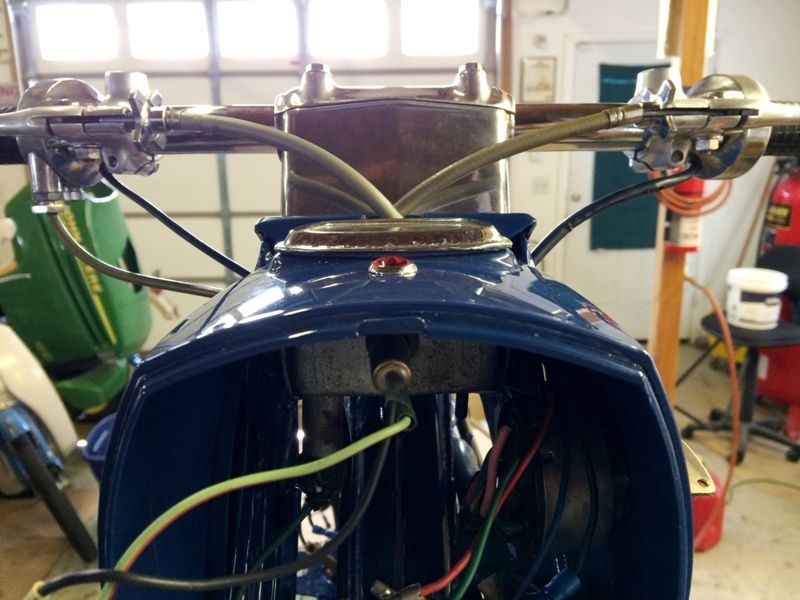
Next it was time to get serious with the electrical system. Using a 1 amp charger and isolating the points, I went through all the functions in each key position, getting everything to light up (except just looking for voltage at the headlight) and sound off. Of course the horn sounds a little sick and the starter solenoid barely clicks with 1 amp. Also checked the ignition and had spark when kicking engine over. I like to verify that early as possible.
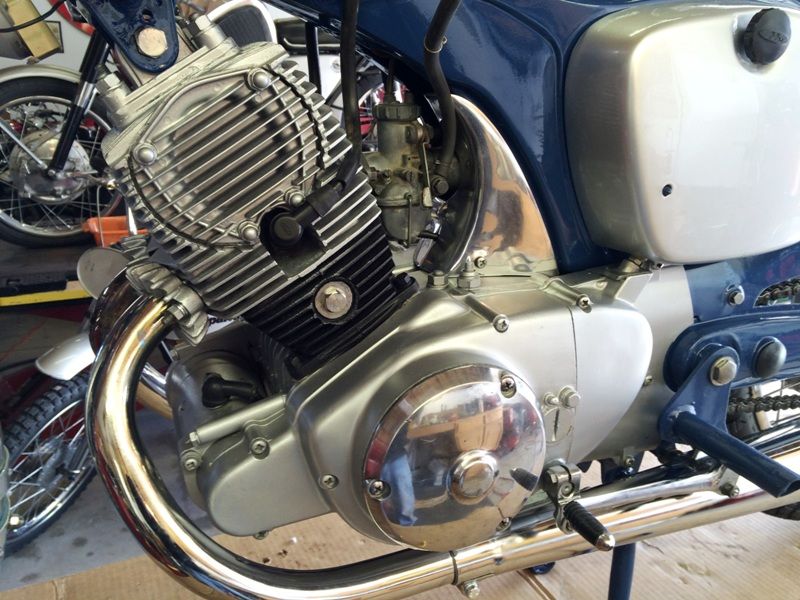
Then I installed the carburetor and air cleaner assembly, then checked electrical again, and found I lost the tail light function. I managed to pull a bullet connector apart when trying to squeeze in the air filter and was glad I rechecked.

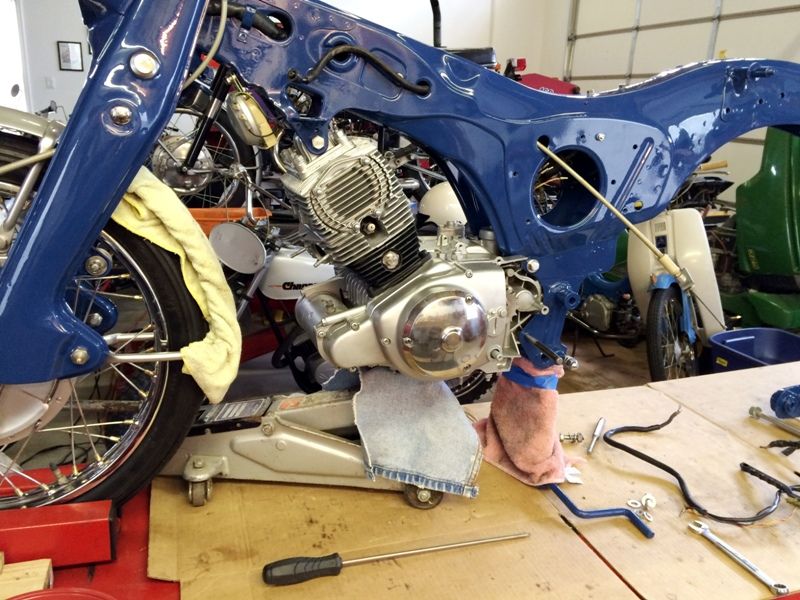
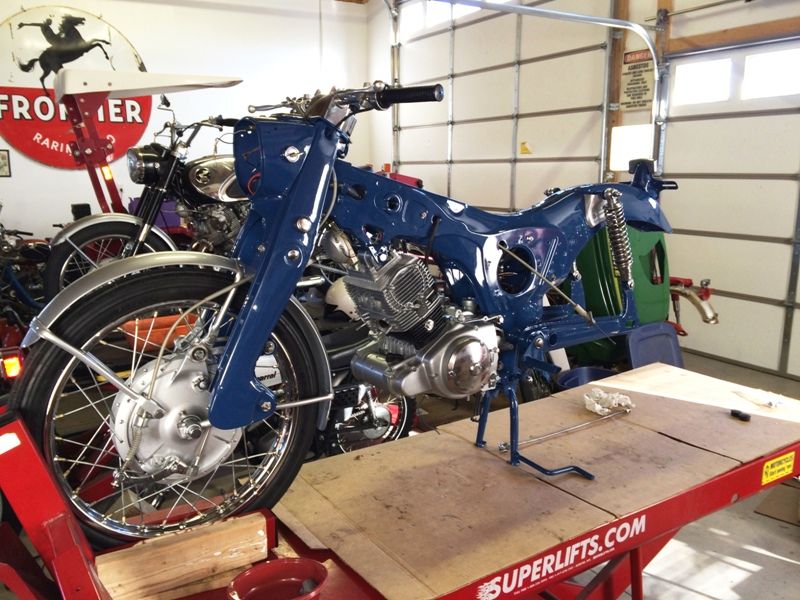
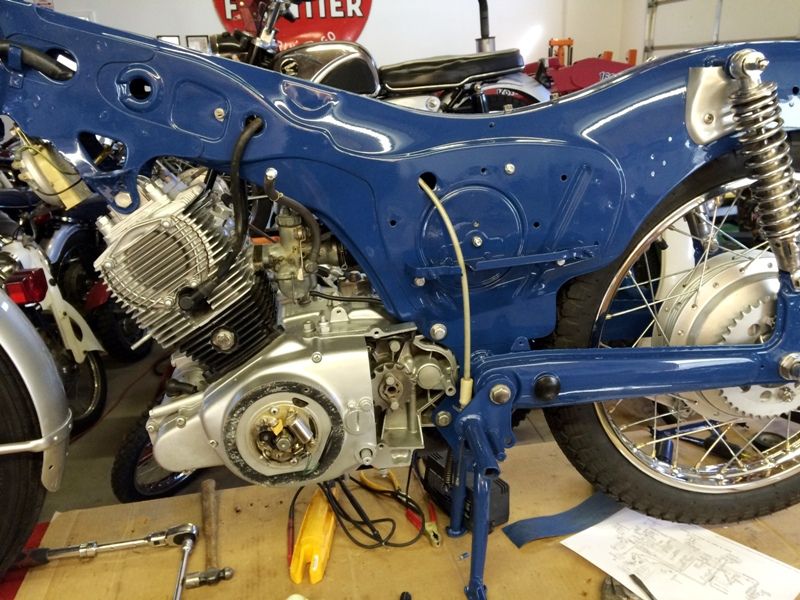
Carburetor installed and filter cover/tool kit holder in place. Also the very important swing arm plastic caps!
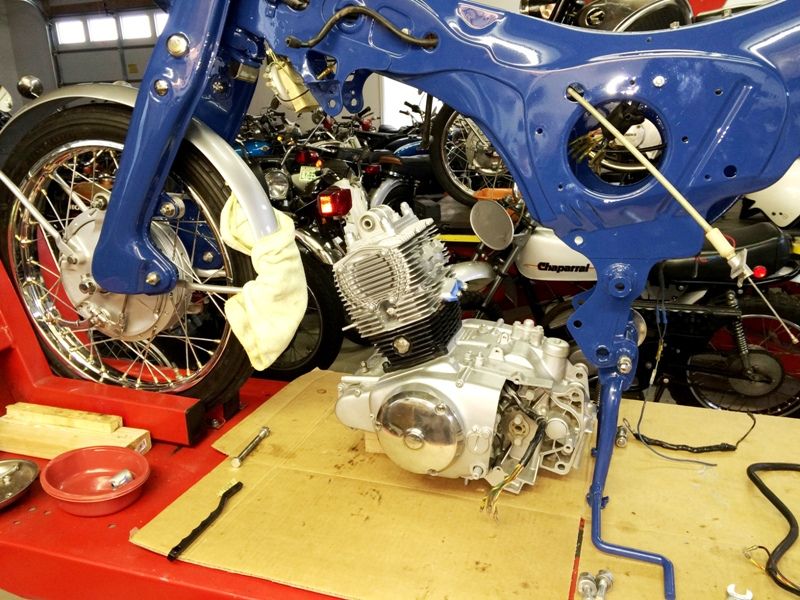
Note the high tech points isolating cardboard. Gotta remember to remove it later.
Image

Next I put on the chain and sprocket covers, after hooking up the clutch cable. Also the chain guard is now in place.
Image

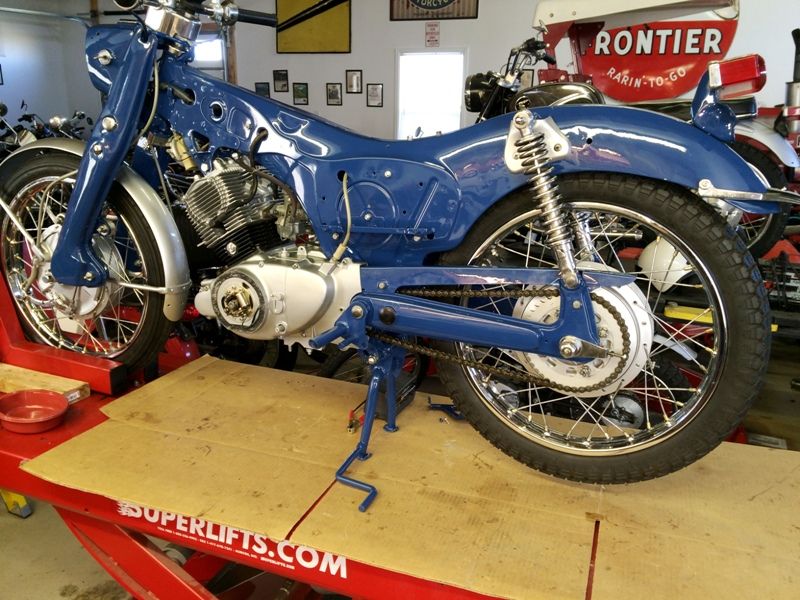
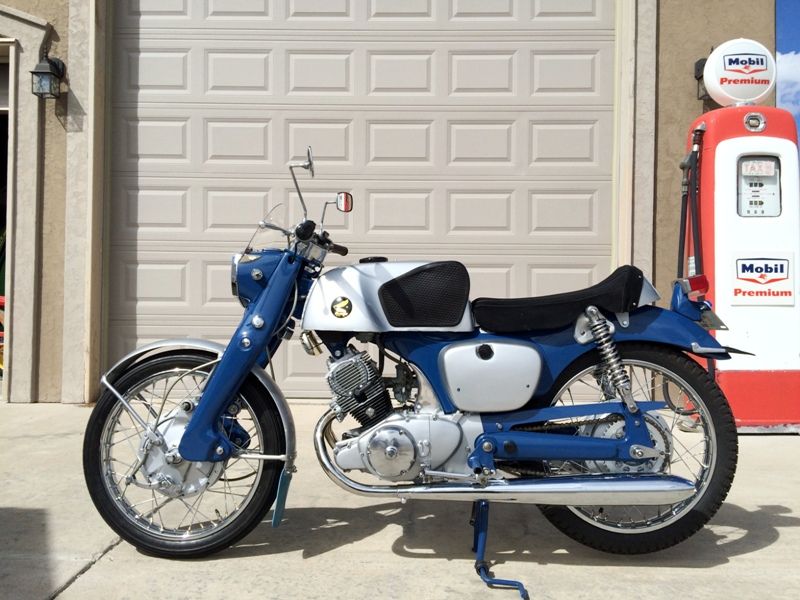
After putting the side cover grommets inside the left cover, it is installed along with the tank and seat bracket and front fuel tank mounts.
Image

Had to do a little extra work on the throttle grip as it was catching on the handle bar. Took a little filing and sanding to get that out of it. That's why in this picture the right mirror is not in position.
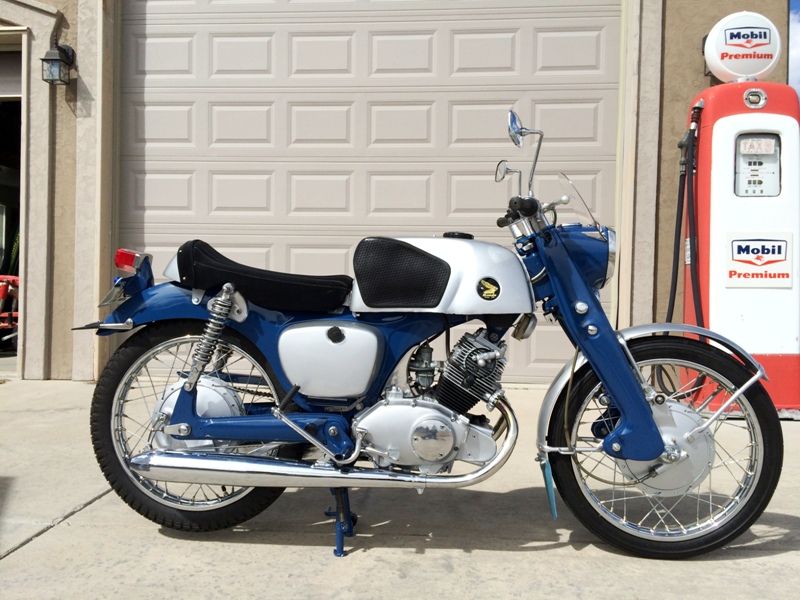
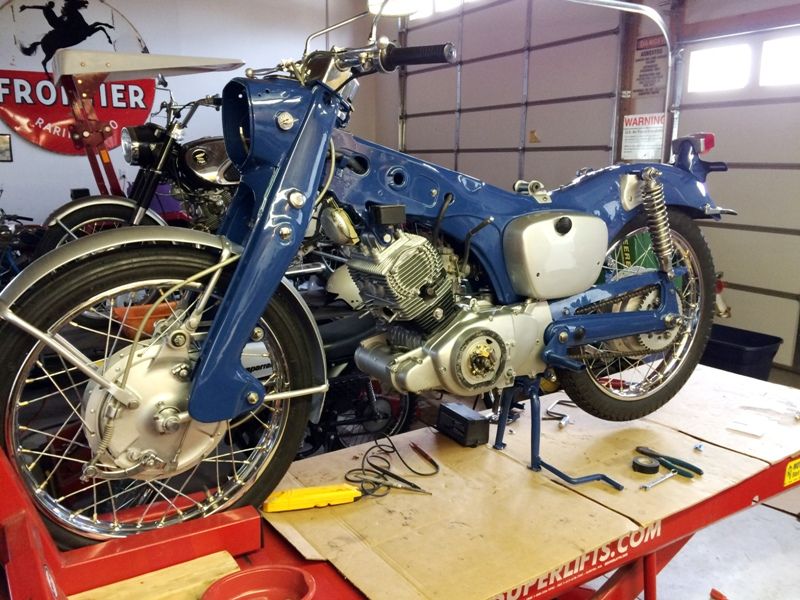
Here's the right side with battery cover on.
Image

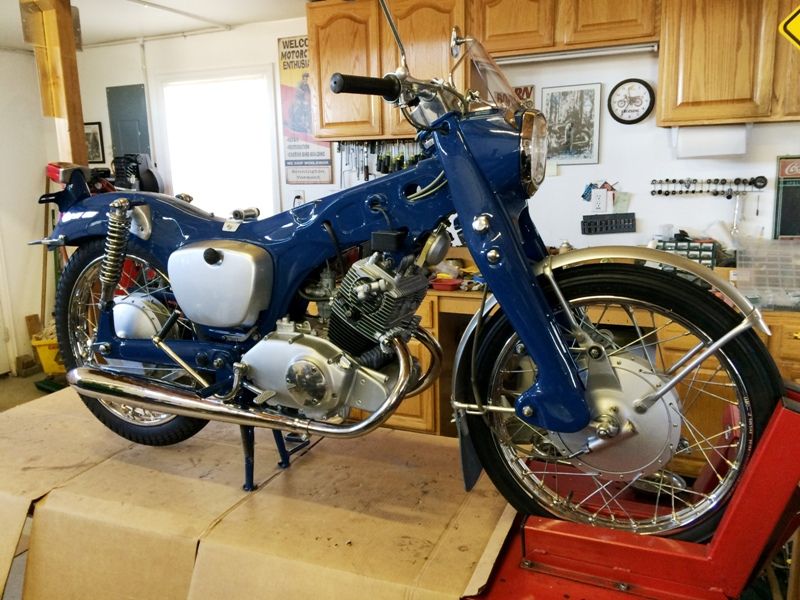
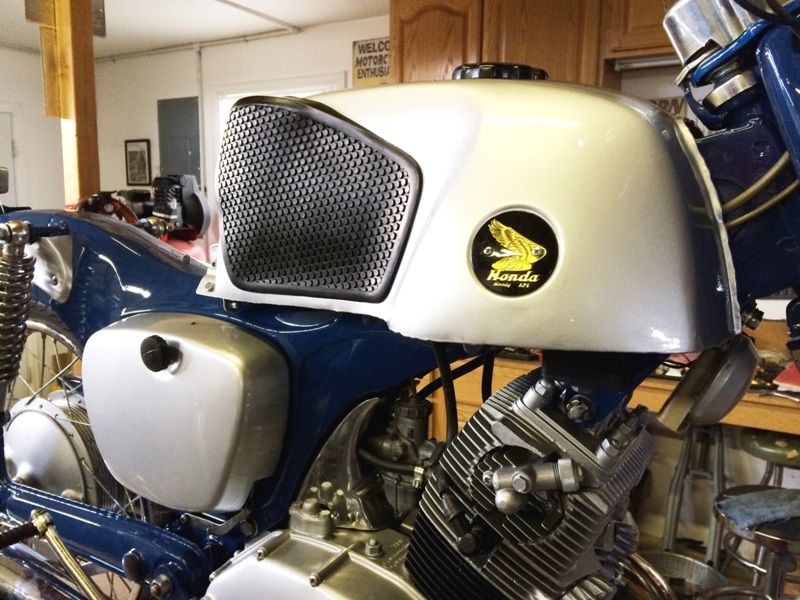
One of the items missing when I purchased this bike, was the fly screen and all the brackets for it.
Here is the new fly screen (Honda's term for a wind shield that is only big enough to divert bugs.)
Also installed an NOS headlight bezel, as the old one had a few pits in the chrome.
Image

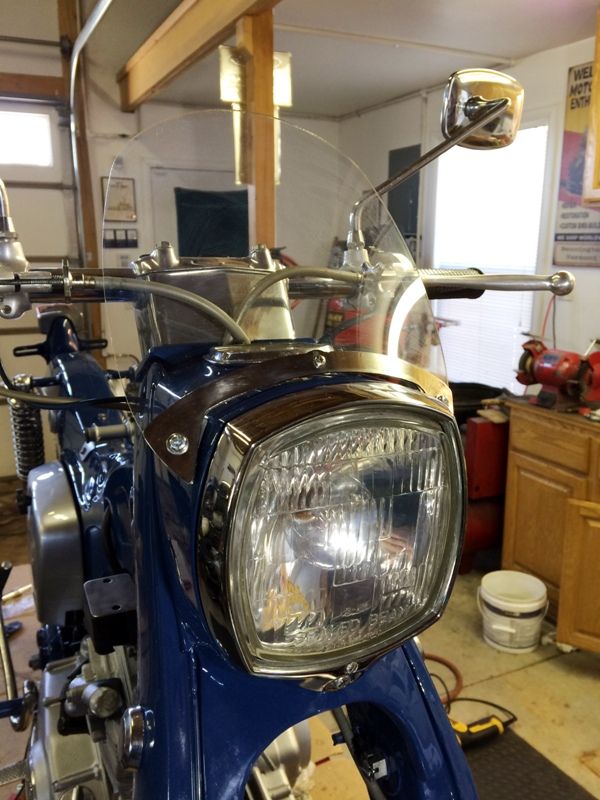
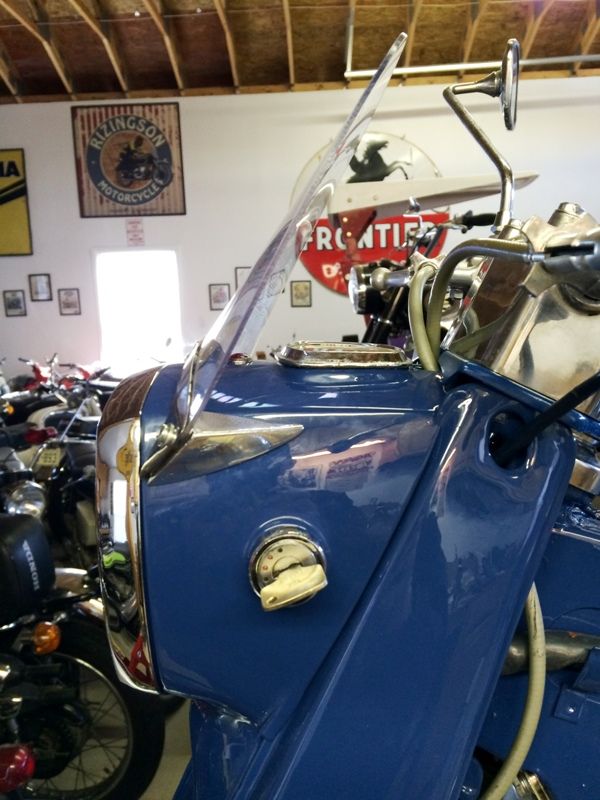
In this picture, you can see how the brackets are used to hold the fly screen to the headlight bucket.
The little oddly angled pieces that attach to the bucket were located in Argentina, while the rest of the parts came from Australia. As mentioned before, this project involved 5 continents to pull it together.
Image

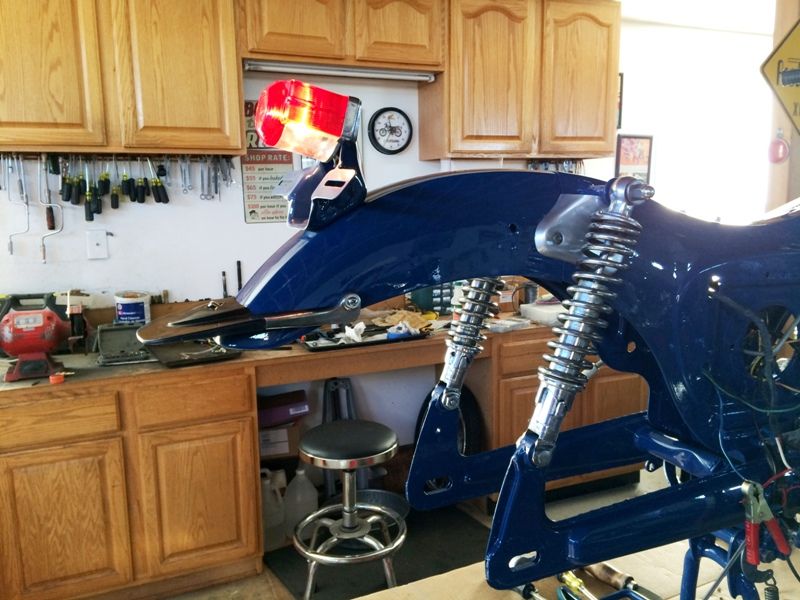
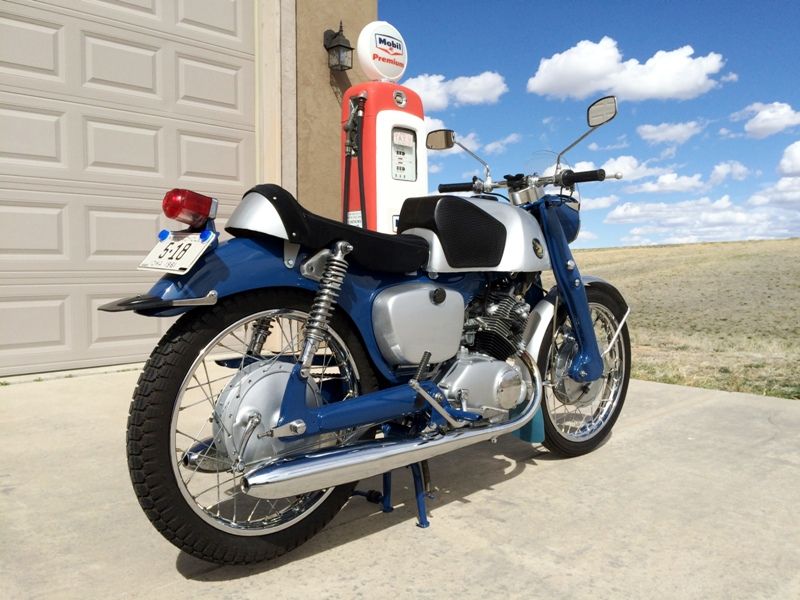
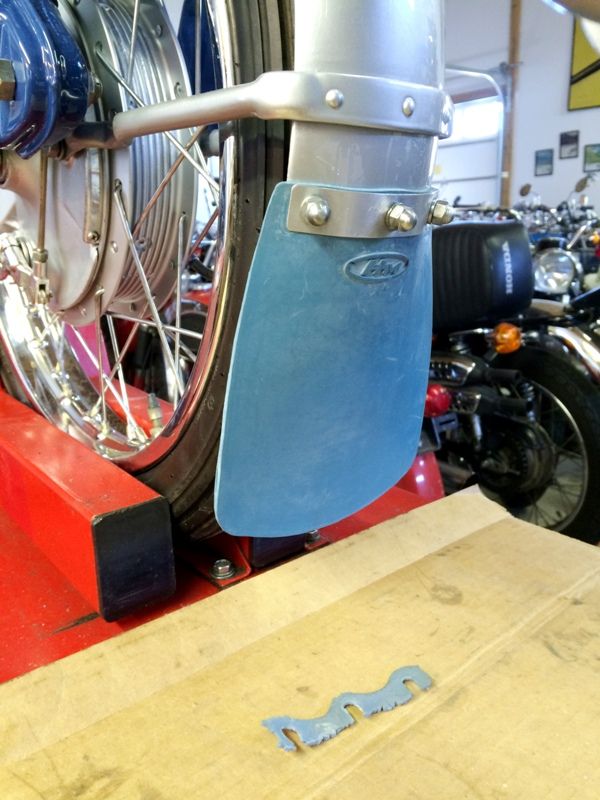
...and to finally complete the front end, I needed to install a new front fender mud flap.
They come in quite a few different colors, but with the remnant that was still caught between the brackets, when I disassembled the bike, I decided to keep the original light blue that it came with.
Image

....so that's it for now. The remaining pile of parts is slowly getting smaller. I hope to fire it up next week on a remote fuel source and dial it in, of course I gotta get some fresh oil in it first. Seems like there's always a lot of little details....later everyone.

User avatar
Rizingson
honda305.com Member
Posts: 57
Joined: Mon May 07, 2012 6:50 pm
Location: Parker, CO USA

Post by Rizingson » Tue Apr 12, 2016 8:05 pm

Finally time to wrap this project up, as I need to get busy with putting batteries and fresh fuel in a bunch of bikes that have been waiting to get operational for the summer.
I started with installing some brand new seamless mufflers. A shout out goes to George DeCamp in NH, for supplying these NOS, still in the box mufflers, that Honda Motor Co headquarters on West Pico Avenue, LA. had originally shipped to Boston in the early '60s. I had also obtained a solid pair of the Racing Megaphones from Tom Kolenko, (VJMC President), which I'll need to have re-chromed due to a little battery acid staining and some mild pitting. I'm anxious to hear what they'll sound like.

Here I've got the new mufflers on.
Image

Once the mufflers were on, I decided to fire up the motor to see how everything worked. So I put in some fresh oil, the battery and used a remote fuel source to start it with. After kicking it over a couple dozen times without luck, I rechecked for spark which was good, so I went ahead and gave it a shot of ether on the air filter. She then fired off and settled out to a good idle and responsive throttle after a couple of minutes of running. Checked the charging system and it was varying the voltage as it should with changes in rpm's.

Next I installed the Carburetor covers. One of the originals had a crack in it, so I thought I'd use this set of polished covers instead.
Image

So now I was ready to finally get the fuel tank installed, after putting on the large rubber knee grip, as well as the petcock, and tank badges. The knee grips for this model aren't the easiest to put on. I warmed them up good, and used some liquid detergent along with a 90 deg pick to help pull them into place and get the lip to drop into the channel around the edge

Here's the tank mounted on the bike.
Image

...and a closer look at the '61 and later tank badge.
Image

Another little item that was missing when I got the bike was the rubber stopper on the center stand. This is needed to prevent the stand from banging into the left muffler.
Image

And one more final touch before I take it outside for a few more pictures. Since this bike had spent it's years in Iowa, I decided to let it continue it's Hawkeye State tradition with an original '61 Iowa motorcycle plate. Complimented with blue reflectors!
Image

Finally outside for a few shot's in the Sun, to better show the results.
Image
Image
Image
Image

I realize the before and after pictures aren't a big difference, but up close in person, this bike looks so much better than when I got it. Pictures sometimes don't reflect all the minor blemishes and pitting of chrome that would be noticed immediately in person. Overall I'm quite happy with the way this turned out, and don't feel like it has anything to hide when showing it. Plan's are for it to be going with a few of my other bikes to McPherson, KS on April 30th, for a show at the college where the KCVJMC was asked to put on a display for Motoring Fest 2016.
Thanks for your interest, comments and patience will I put together this build thread.

Post Reply
cron


CB-77 | CYP-77 | Road Test | Riding Log | Literature | Zen | Marketplace | VJ Survey | Links | Home